Make the most out of your listings
This guide will assist you on creating a compelling listing that will get Go Overseas users interested in your program. Each of these sections correlates to a field on the Go Overseas’ program listings form. Use them to help you while you’re creating your program listing.
Start with a Few Simple Steps:
- Creating a New Listing
- Titles DO's and DONT's
- Writing Your Description & Highlights
- Selecting Your Program Details
- Assign Your Landing Pages
- Landing Pages (Your Links)
- Add Digital Media
- Add A Special Announcement
- Curate Fresh Reviews
- Interviews
- Wrapping Up Your Listing
- Common Questions
1. Create Your New Listing:
Before we jump into the individual components of your program listing, here is how you navigate to creating a new listing. New listings can be created via Dashboard > Content > Program Listings > Add New Program.
*To edit an existing listing, just navigate to Dashboard > Content > Program Listings > Edit.
2. Title DO's and DONT's:
Think of this title as a brief description of your program. This is what will make users interested in clicking on your listing and finding out more. Be specific and make each of your program titles unique. You do not need to include your company name in your title, as the company title will always be tagged wherever the listing appears.
When choosing a title, think about a user on the website searching for programs and finding a list of options. The user will likely click on titles that are descriptive and eye-catching. A descriptive title may include information such as what kind of program it is (ex. Teach Abroad), what activity it is (ex. conservation), its location (ex. country), its timeframe (ex. summer program), and/or who it’s for (ex. graduates). Other things to remember:
Title writing DOs:
|
Title writing DONTs:
|
3. Writing Your About & Highlights sections:
Take this opportunity to include 1-2 paragraphs of unique content about your program. Be sure to create a completely unique listing description here (always avoid copy and pasting), which will ensure the the page is SEO optimized.
The listings are a reflection of your company’s values, mission, and vision. Use this section to give a clear, concise description of the program. Try to give users insight into what daily life may be like one the program so they may imagine themselves as a participant.
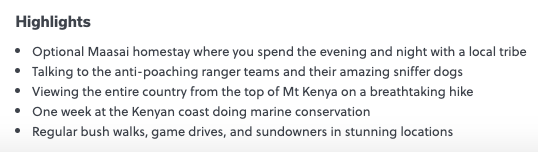
Go Overseas users tend to skip around when they first arrive on a listing. One of the first things users skim for is your Highlights. You can add up to five, and it is in your best interest to use all five of them. Highlights should be used to bring attention to the unique parts of your program. Use this section to show why your program is special and to highlight unique opportunities– what are the top five things you want users to know about your program?
4. Selecting Your Program Details
This details section maps where your listing appears on Go Overseas, so be sure to fill in all of the details that are relevant to your program. It is important that you use only tags that are pertinent to your program so that users have a clear understanding of what the program entails.
Make sure to add all locations where your program operates.
Fill in all the relevant fields that you can, with as much information as possible (ie. pricing, what is/is not included, age range, accommodation types, length of program, etc).
- For volunteer programs, be sure to write an Impact section telling users why your program's project makes a difference in the host community.
Be as specific as possible, but don’t check boxes that aren’t relevant to the program (we monitor for over-tagging).
5. Assign Your Landing Pages:
This is your chance to direct the user to the best, most relevant, most informative page on your website. When a user clicks to your website, it is important that they go directly to a landing page specific to that program.
Make sure you keep your links up-to-date! If you change the URL on one of these pages, come back to Go Overseas to update them (ie. when you switch your website to a secure site, the URL will be changed from http to https).
The “Visit Site” button should link to the relevant program page on your website. It's imperative to match user intent. For example, if a user is reading about Interning in Spain, don't direct them to your homepage– send them to your Intern in Spain landing page. Implementing a lead form on this page is a great way to curate leads so you can reach out directly to interested users.
The “Apply Now” button should be a call to action such as an application or a lead form. If you don’t have one, you can link to the program landing page.
6. Add Digital Media:
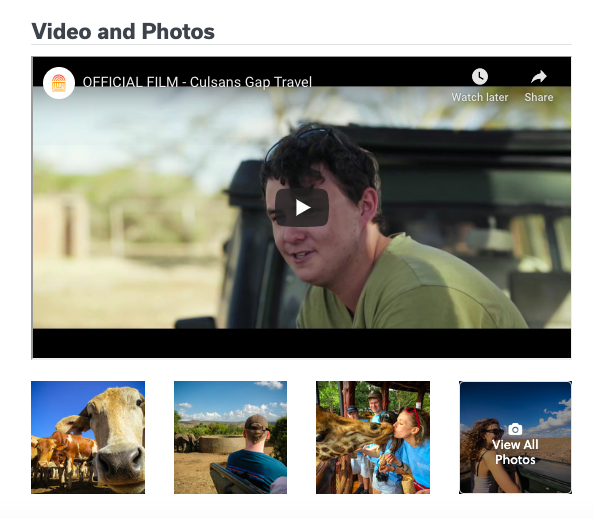
People love photo and video content! Let them see what your program is all about here. When users first arrive on a listing, the first thing they typically do is watch part of a video, then look through photos.
Photos (start with a minimum of five) - We recommend uploading high definition photos (featuring people/alumni, landscapes, and accommodations) at around a 800px width. The minimum upload photo file size is 631px (width).
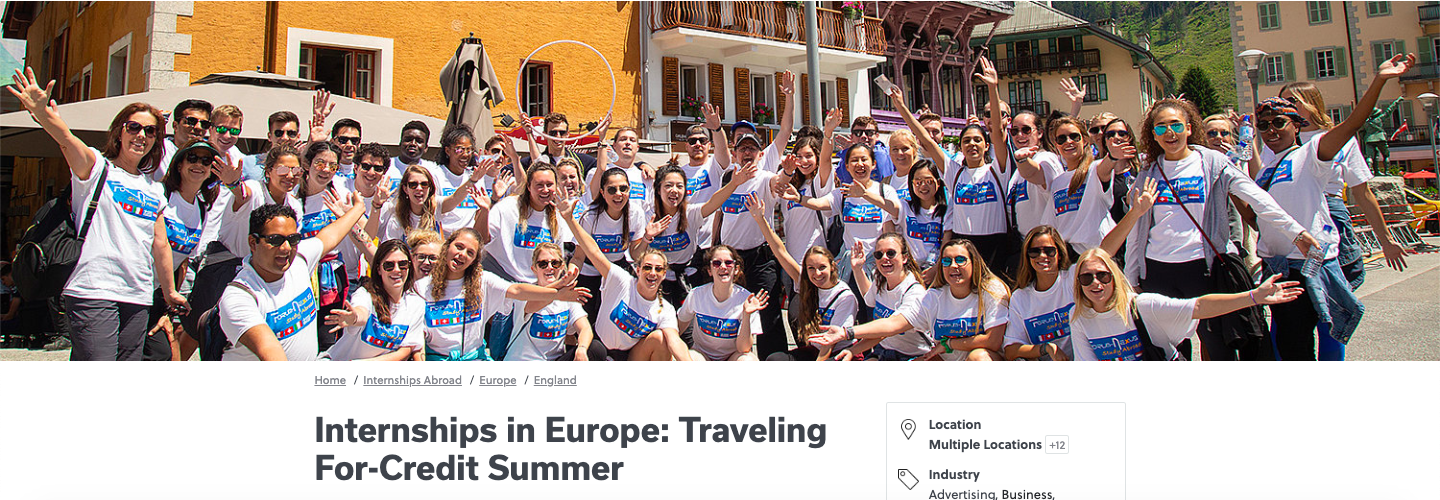
- Cover photo - appears across the top of your listing. Must be a jpeg larger than 1500x400 pixels:
- The first photo in the list will appear as the thumbnail.
- Alt-Text (here's why it's important).
- Captions - display on your listings and users scroll through
Video - Video is extremely compelling, so be sure to add what you have. User engagement is hugely improved by the addition of a video.
NOTE: We aggregate Community Photos (photos left by your alumni in their reviews) into your photostream on each individual listing.
7. Curate Fresh Reviews:
Users come to Go Overseas in order to read authentic, verified reviews. The number one most important thing you can do to optimize your listing(s) is continuously curating reviews.
When users conduct searches on our website, one of the first things they do is order results by "Most Reviewed". As your listing accumulates reviews, its visibility will grow. When you have a review from the last 45 days, your listing will see a boost in visibility and a banner will appear that says "New Review". Users love to see that a program was recently reviewed because this shows that the listing is up-to-date and people are actively participating in the program. This serves to build trust and excitement in users.
On Go Overseas, your listing will be indexed (making it searchable on Google so that organic traffic can find your programs) once you have at least three reviews.
Click here to read tips for gathering reviews.
8. Interviews:
Staff Interview: Whether your listing is for a brand new program or for one that has been around for years, staff interviews are a critical way for you to add unique content to your listings and build trust with users. The Staff Interview form takes about 10 minutes to fill out, and it allows you to give an inside look at your organization and add valuable photos from your personal experiences. Be sure to fill one out when your Account Manager sends you a link (or reach out and ask for it), then share that link with your colleagues!
Alumni Interviews: Whenever your listings receive an overall rating of 8 or higher, we automatically reach out to your alumni for a short interview. This allows alumni to add pictures and share more about their positive experience.
9. Add A Special Announcement:
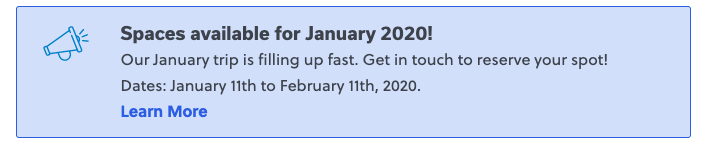
You can add a special announcement that populates across all of your listings and your provider page. This announcement allows you to add another link back to your website and to highlight any unique information. The announcement will populate below the Highlights section and above the Q&A.
Create an announcement via Dashboard > Edit Provider Profile > Add Announcement.
Some creative ideas for announcements:
- Application deadlines (link to your application)
- Start dates (link to the program page)
- Scholarships or special offers (link to the relevant page of your website)
- Get in touch (link to a contact form)
10. Wrapping Up Your Listing:
This is your last chance to add any information you may have left out! Be sure to fill out all of the fields. Again, these details map Go Overseas so be sure to be thorough. Be specific and relevant to your program.
When selecting program types, only select what best describes your program. Checking more types of programs will not increase your visibility on Go Overseas.
Commonly Asked Questions:
Can I add links in my program description?
Links are not allowed within the program description or pricing details. However, you can add links to your website under our “Your Links” section (these will be generated as your “Visit Site” and “Apply Now" buttons). You can also add a link to the Special Announcement.
Why isn't my program published?
After you create a listing it is sent to our content team to be reviewed. We will double-check your submission for unique text in the program description, media, correct silo and tags, along with testing your CTA links. Please note that this process typically takes up to 2 business days. Once reviewed by our team, the listing will move from your unpublished queue to your active listings. To help with processing times, please do not reach out if we are within our review window.
How is a program listing different from my profile homepage?
Your profile should describe your organization, whereas the program listing should describe the specific program you are trying to advertise.